`멀티쓰레드` 프로그래밍
프로세스의 동시성, 병행성.
OS가 어떻게 관리를 하는지.
`멀티태스킹(Multi-tasking) `
하나의 CPU가 여러가지 작업을 번갈아 처리함. 즉, 하나의 응용프로그램이 여러개의 작업(task)에 처리
`멀티프로세스`
여러 cpu또는 CPU코어를 이용해 여러 프로세스를 동시에 실행
`프로세스` : OS에서 관리하는 실행단위
멀티쓰레드
하나의 프로그램(프로세스) 내에서 여러 작업들(미니 프로세스들) 동시수행
각각의 작업은 `쓰레드`라고 부름.
`쓰레드 | thread` 프로세스 내에서 메모리를 공유함/ 프로세스 내에서 실행되는 가장 작은 작업단위
- 경량성 : 프로세스보다 생성/소멸 비용이 낮음
- 메모리공유하며 독립적 동작으로 빠른 응답에 최적
- 동시에접근하며 동기화 문제가발생할 수 있다.
Java = 기본 멀티 쓰레드를 지원한다.
Java의 메인 쓰레드(main)
자바 프로그램은 메인쓰레드가 main()메소드 실행하며 시작.
동시성과 병렬성
하나의 CPU가 작업을 쪼개 번갈아가며 실행하여 마치 '동시에' 실행되는것처럼 보이는 구조
`Thread`, `Runnable`, `synchronized`
병렬성
여러 CPU가 실제로 동시에 각각의 작업을 처리함.
`parallelStream()` , `ForkJoinPool`, `CompletableFuture` + ...


자바에서 동시성을 구현하려면 쓰레드. 멀티쓰레드를 구현하는 방법은 세가지가 있다. 매번 출력양상이달라짐.
자 하단의 코드에서 중요한거.
t1.start나 t2.start나 실제 실행은 OS가 결정한다.
t1이 먼저 적혔다고해서 그게 먼저 실행되는것은 아님.
package Week4Thread;
public class Main {
public static void main(String[] args) {
// TODO Auto-generated method stub
Thread t1 = new Mythread();
t1.start();
Thread t2 = new Thread(new Myrunnable());
t2.start(); // 실행은 뒤죽박죽
// 지피티는 익명클래스...
Thread t3 = new Thread(new Runnable() {
@Override
public void run() {
// TODO Auto-generated method stub
for (int i = 0; i < 10; i++)
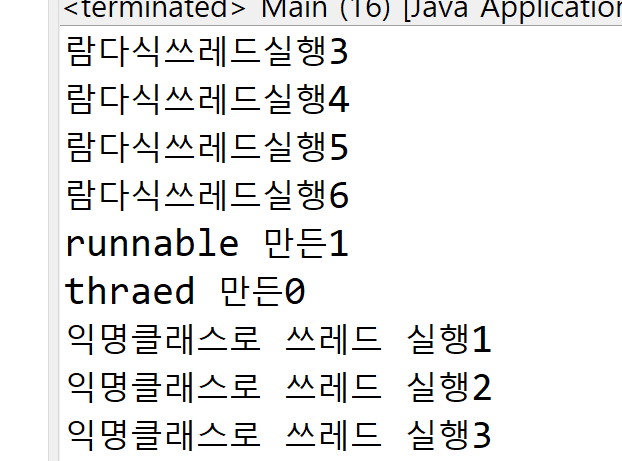
System.out.println("익명클래스로 쓰레드 실행" + i);
}
});
t3.start();
// 람다식 사용
Thread t4 = new Thread(() -> {
for (int i = 0; i < 10; i++)
System.out.println("람다식쓰레드실행" + i);
});
t4.start();
}
}
스레드의 현실은 내부가 난장판이다.
그렇기 때문에 OS에서 스케줄링이 중요하다!


보면, 지멋대로 돌아감. 반복도 순서 없이 지멋대로... 알아서 돌아간다. 명심하자 순서대로 돌아가는게 아니다!
#lab4 interrupted 사용해보기
package Week4Thread;
public class 자동차경주 {
static int goal = 30;
public static void main(String[] args) {
int goal = 100;
Thread car1 = new Car("붕붕카",1000);
Thread car2 = new Car("스포츠카",1000);
Thread car3 = new Car("세발제전거",3000);
System.out.println("시작!!!!!!!============");
car1.start();
car2.start();
car3.start();
try {
Thread.sleep(3000);
} catch (InterruptedException e) {
// TODO Auto-generated catch block
e.printStackTrace();
}
car2.interrupt();
}
}
class Car extends Thread{
String name;
int speed;
volatile boolean stop=false; //volita가 제어할 떄 사용함.
public Car(String name, int speed) {
this.name=name;
this.speed=speed;
System.out.println(name+"생성");
}
public void run() {
for(int i=0; i<자동차경주.goal;i++) {
System.out.println(name+i+"km...");
if((int)(Math.random()*1000)%100<5) {
System.out.println(name+"고장일세.");
this.interrupt();
}
if(Thread.interrupted()) {
System.out.println(name+i+"km지점에서 인터럽트 감지되므로 쓰레드 종료");
return;
}
//외부에서 보낸 인터럽트 신호 감지
try {
Thread.sleep(300);
} catch (InterruptedException e) {
System.out.println(name+": sleep 도중 인터럽트 발생"+e.getMessage());
return; // 안전히 종료
}
}
System.out.println(name+"도착!!");
}
}

`volatile`= CPU 캐시 무시하고 메인 메모리 직접 읽고 쓰기
Thread 동기화가 필요한 이유
ex) 화장실에 문 안잠그다보니까, 다른 사람(스레드)가 막 들어옴;;
공유 데이터의 동시 접근 문제를 해결하기 위해!
synchronized : 한 스레드가 공유자원에 대해 `독점 실행`해야 하는 부분을 표시하는 키워드

Lab #5 MyBank 실험하기


출력이 있는거 없는거에 따라 인풋/아웃풋의 유무 때문에 지연이 없어지기때문에 오류가 발생한다.
우측보면 오류가 발생하는 경우를 찾아볼 수 있다.
| 구분 | 출력 있음 | 출력 없음 |
| 스레드 간 실행 간섭 | 증가 (I/O 때문에 스케줄링 잠깐 지연) | 최소 (CPU만 사용, 빠른 race condition 발생) |
| race condition 발생 | 확률 낮음 | 확률 높음 |
| 음수 잔고 | 잘 안 나올 수 있음 | 자주 발생 가능 |
lab#6 familiy account
package Week4Thread;
public class FamilityAccount {
public static void main(String[] args) throws InterruptedException{
BankAccountV1 account = new BankAccountV1();
Thread depositor = new Depositor(account);
Thread withdrawer = new Withdrawer(account);
depositor.start();
withdrawer.start();
depositor.join(); // 예금자종료까지대기
withdrawer.join(); // 인출자종료까지대기
//모든거래종료후 최종
System.out.println("거래종료 -> 최종잔액: "+account.getBalance());
}
}
class BankAccountV1{
private int balance = 0;
private int depositAll=0;
private int withdrawAll =0;
public synchronized void deposit(int amount) {
balance += amount;
depositAll += amount;
System.out.println("$예금 : " + amount+"원 -> 잔액: "+balance);
}
public synchronized void withdraw(int amount) {
if(balance>=amount) {
balance -= amount;
withdrawAll += amount;
System.out.println("-- 인출 : " + amount+"원 -> 잔액: "+balance);
}
else {//잔액부족
System.out.println("인출 실패 !! 잔액부족 (" + balance+"원");
}
}
//잔액조회
public int getBalance() {
System.out.println("total 저축: "+ depositAll);
System.out.println("total 저축: "+ withdrawAll);
return balance;
}
}
//예금자쓰레드 1초 1000원씩 예금 10회
class Depositor extends Thread{
private final BankAccountV1 account;
public Depositor(BankAccountV1 account) {
this.account=account;
}
public void run() {
for(int i = 0;i<10;i++) {
System.out.println("["+(i+1)+"]");
account.deposit(1000);
try {
Thread.sleep(1000);
} catch (InterruptedException e) {
// TODO Auto-generated catch block
e.printStackTrace();
}
}
}
}
//인출자쓰레드 1.5초에1500원 인출
class Withdrawer extends Thread{
private final BankAccountV1 account;
public Withdrawer(BankAccountV1 account) {
this.account=account;
}
public void run() {
for(int i = 0;i<10;i++) {
System.out.println("["+(i+1)+"]");
account.withdraw(1500);
try {
Thread.sleep(1500);
} catch (InterruptedException e) {
// TODO Auto-generated catch block
e.printStackTrace();
}
}
}
}
보면 끝날때까지 대기하고있다 ^~^
lab#7 join 체험하기
package Week4Thread;
public class littlePigTest {
public static void main(String[] args) {
// TODO Auto-generated method stub
Piglet pig1 = new Piglet("첫째");
Piglet pig2 = new Piglet("둘째");
Piglet pig3 = new Piglet("셋째");
pig1.start();
pig2.start();
pig3.start();
try {
pig1.join();
pig2.join();
pig3.join();
} catch (InterruptedException e) {
// TODO Auto-generated catch block
e.printStackTrace();
}
System.out.println("돼지모두도착!");
System.out.println("어서왕 🐷🐷🐷🐷");
}
}
class Piglet extends Thread{
private final String name;
int time;
public Piglet(String name) {
this.name=name;
this.time=(int)(Math.random()*7000)+3000; // 3~10sec
}
@Override
public void run() {
// TODO Auto-generated method stub
System.out.println("(^❤️🐽❤️^)밖에서 놀다오는 아기돼지 "+(time/1000)+"초 동안 놀다올겁니당");
try {
Thread.sleep(time);
} catch (InterruptedException e) {
// TODO Auto-generated catch block
e.printStackTrace();
}
System.out.println(this.name +" 돼지는 집앞에도착 🐽🐽🐽🐽🐽");
}
}
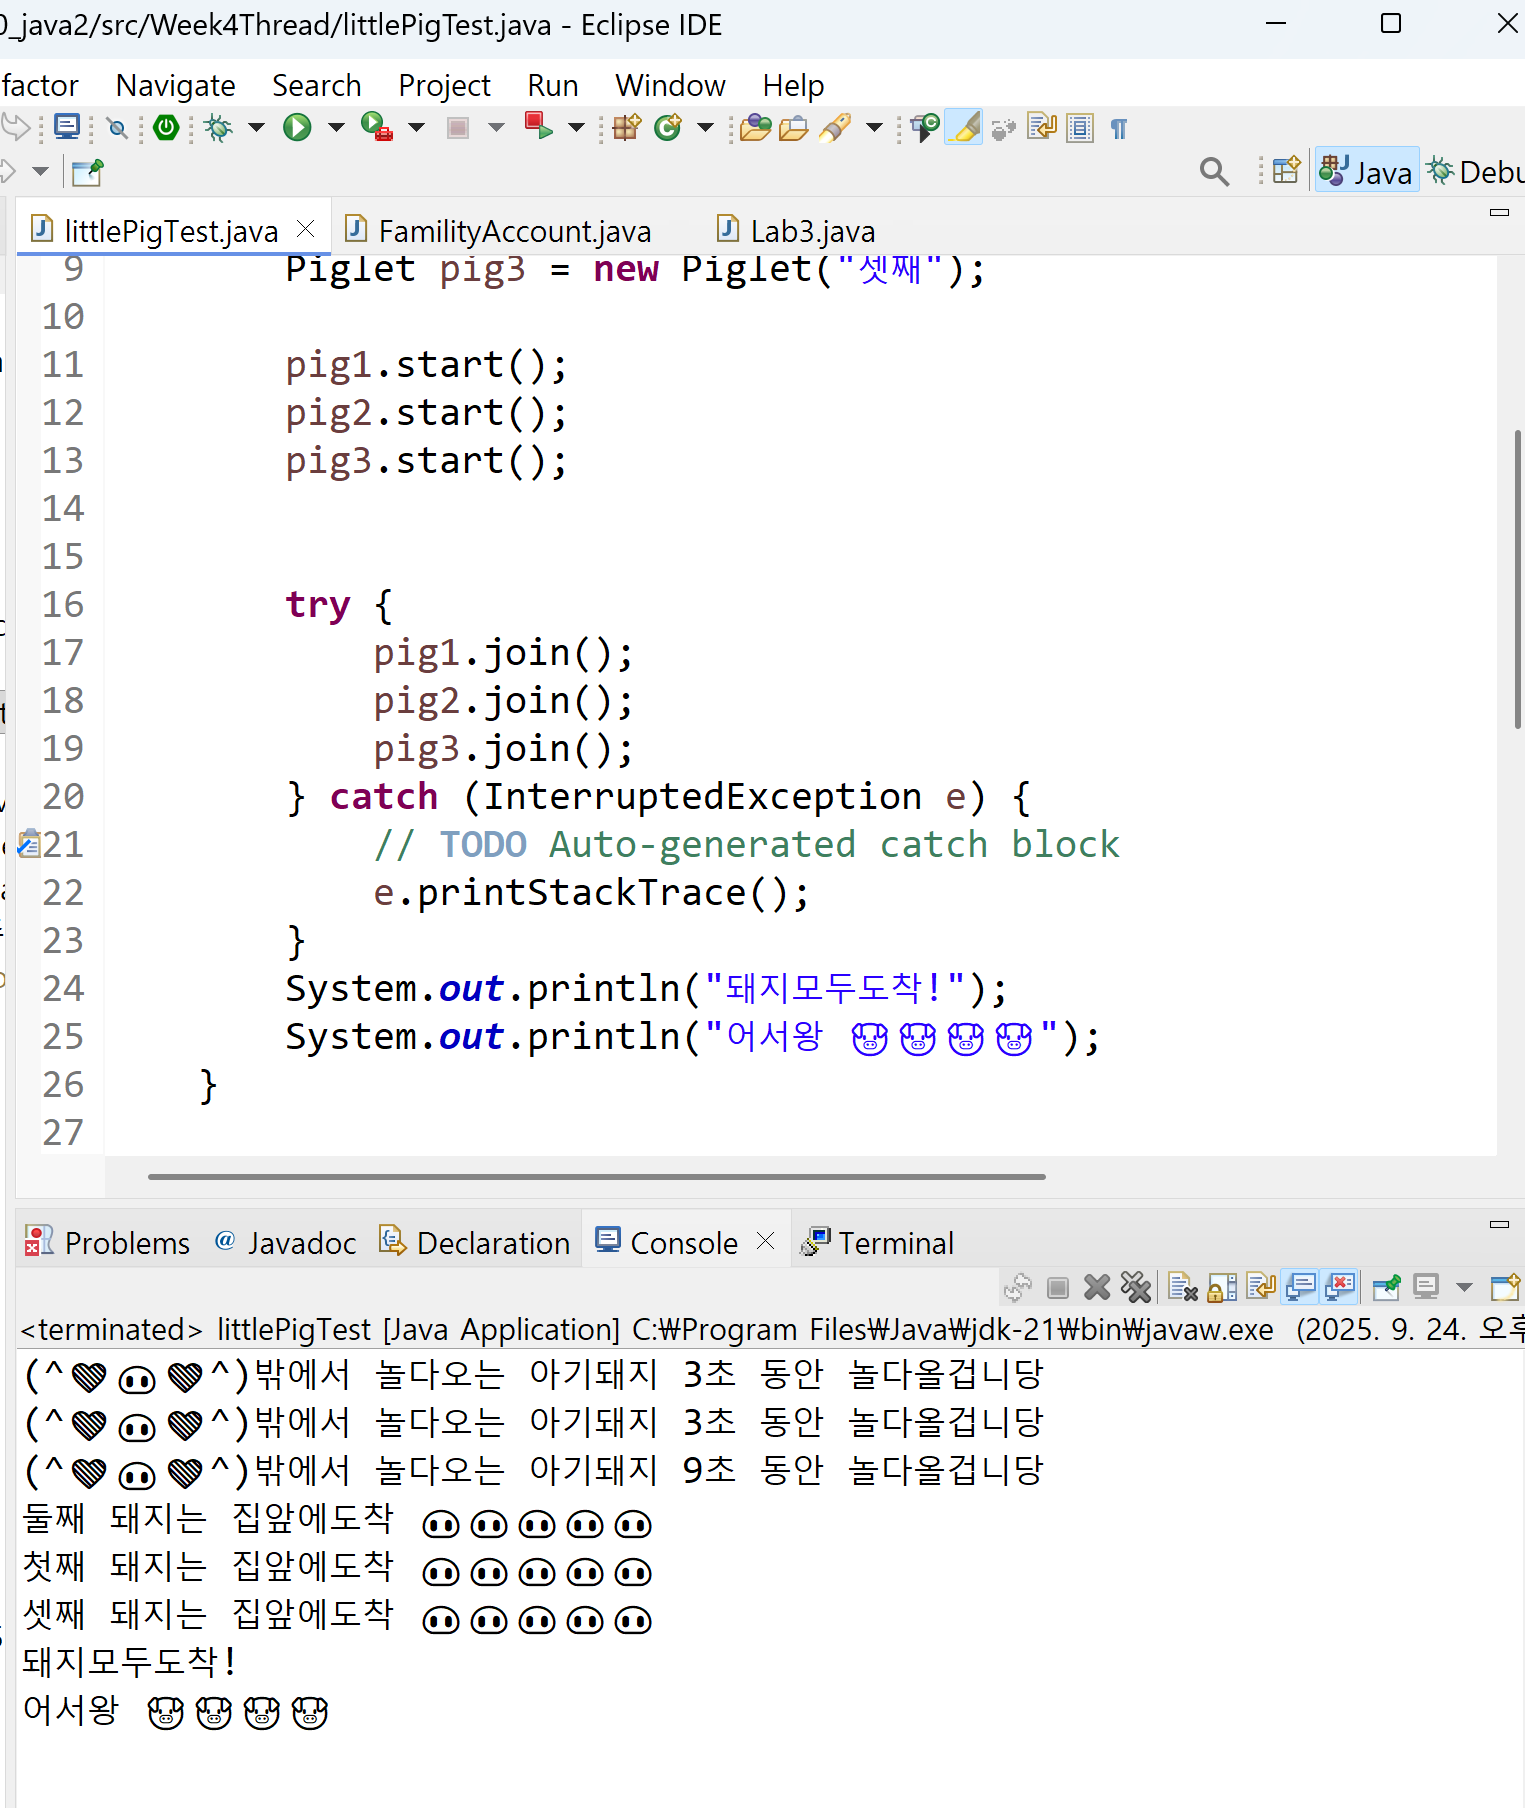
궁금한점이생김. Family Account에서는 join할때 try/catch로 예외발생안하는데, 이 돼지예제에서는 왜 예외가 발생할까?
>>> void main(String[] args) throws InterruptedException{ 차이였다.. throw로 던지는지 안던지는지 차이!
Thread 상태제어 `sleep()`, `wait()`
`sleep() `: 일정 시간동안 쓰레드 중지
소속 : Thread 클래스
(ex) `Thread.sleep(1000)` 1초동안 멈춘다. 1000 ms
락(lock) 유지하고, 지정시간 지나면 재개. 일시 정지 상태에서 interrupt() 메소드 호출 시,
InterruptedException 이 발생한다.
`wait` : 다른 쓰레드의 신호를 기다리며 일시중지!
소속 : Object 클래스
락(Lock)을 반납한 채, 다른 누군가 `notify()`, `notifyAll` 해줄 때 까지 기다림
락(Lock) : 여러 쓰레드가 동시에 하나의 자원에 접근하려고 할 때 사용됨.(공유자원 접근)
락을 가진 쓰레드만 실행할 수 있고, 없다면 기다려야한다. 쓰레드간 충돌/ deadlock을 피하기위해 잘 사용하자.
즉, 위에서 봤었던 `synchronized` 키워드의 목적
한 번에 하나의 쓰레드만 공유 자원에 접근할 수 있도록 락을 건다.
- synchronized = 락 잡고 들어옴, 끝나면 자동 반납.
- sleep() = 그냥 잠깐 멈춤, 락은 계속 쥔 채로.
- wait() = 락을 내려놓고 다른 쓰레드가 들어오게 해줌, notify()/notifyAll()로 깨워야 다시 진행.
하단의 예제를봅시다
class Shared {
    synchronized void syncMethod() throws InterruptedException {
        System.out.println(Thread.currentThread().getName() + " 들어옴");

        // sleep은 락을 놓지 않음
        Thread.sleep(2000);
        System.out.println(Thread.currentThread().getName() + " sleep 끝");

        // wait은 락을 반납하고 대기
        wait();
        System.out.println(Thread.currentThread().getName() + " wait 끝");
    }
}
- sleep() → 2초 동안 다른 쓰레드가 절대 못 들어옴 (락을 붙잡고 있음).
- wait() → 곧바로 락을 반납하므로, 다른 쓰레드가 syncMethod()에 들어올 수 있음.
sleep, wait 사용 예제 #2
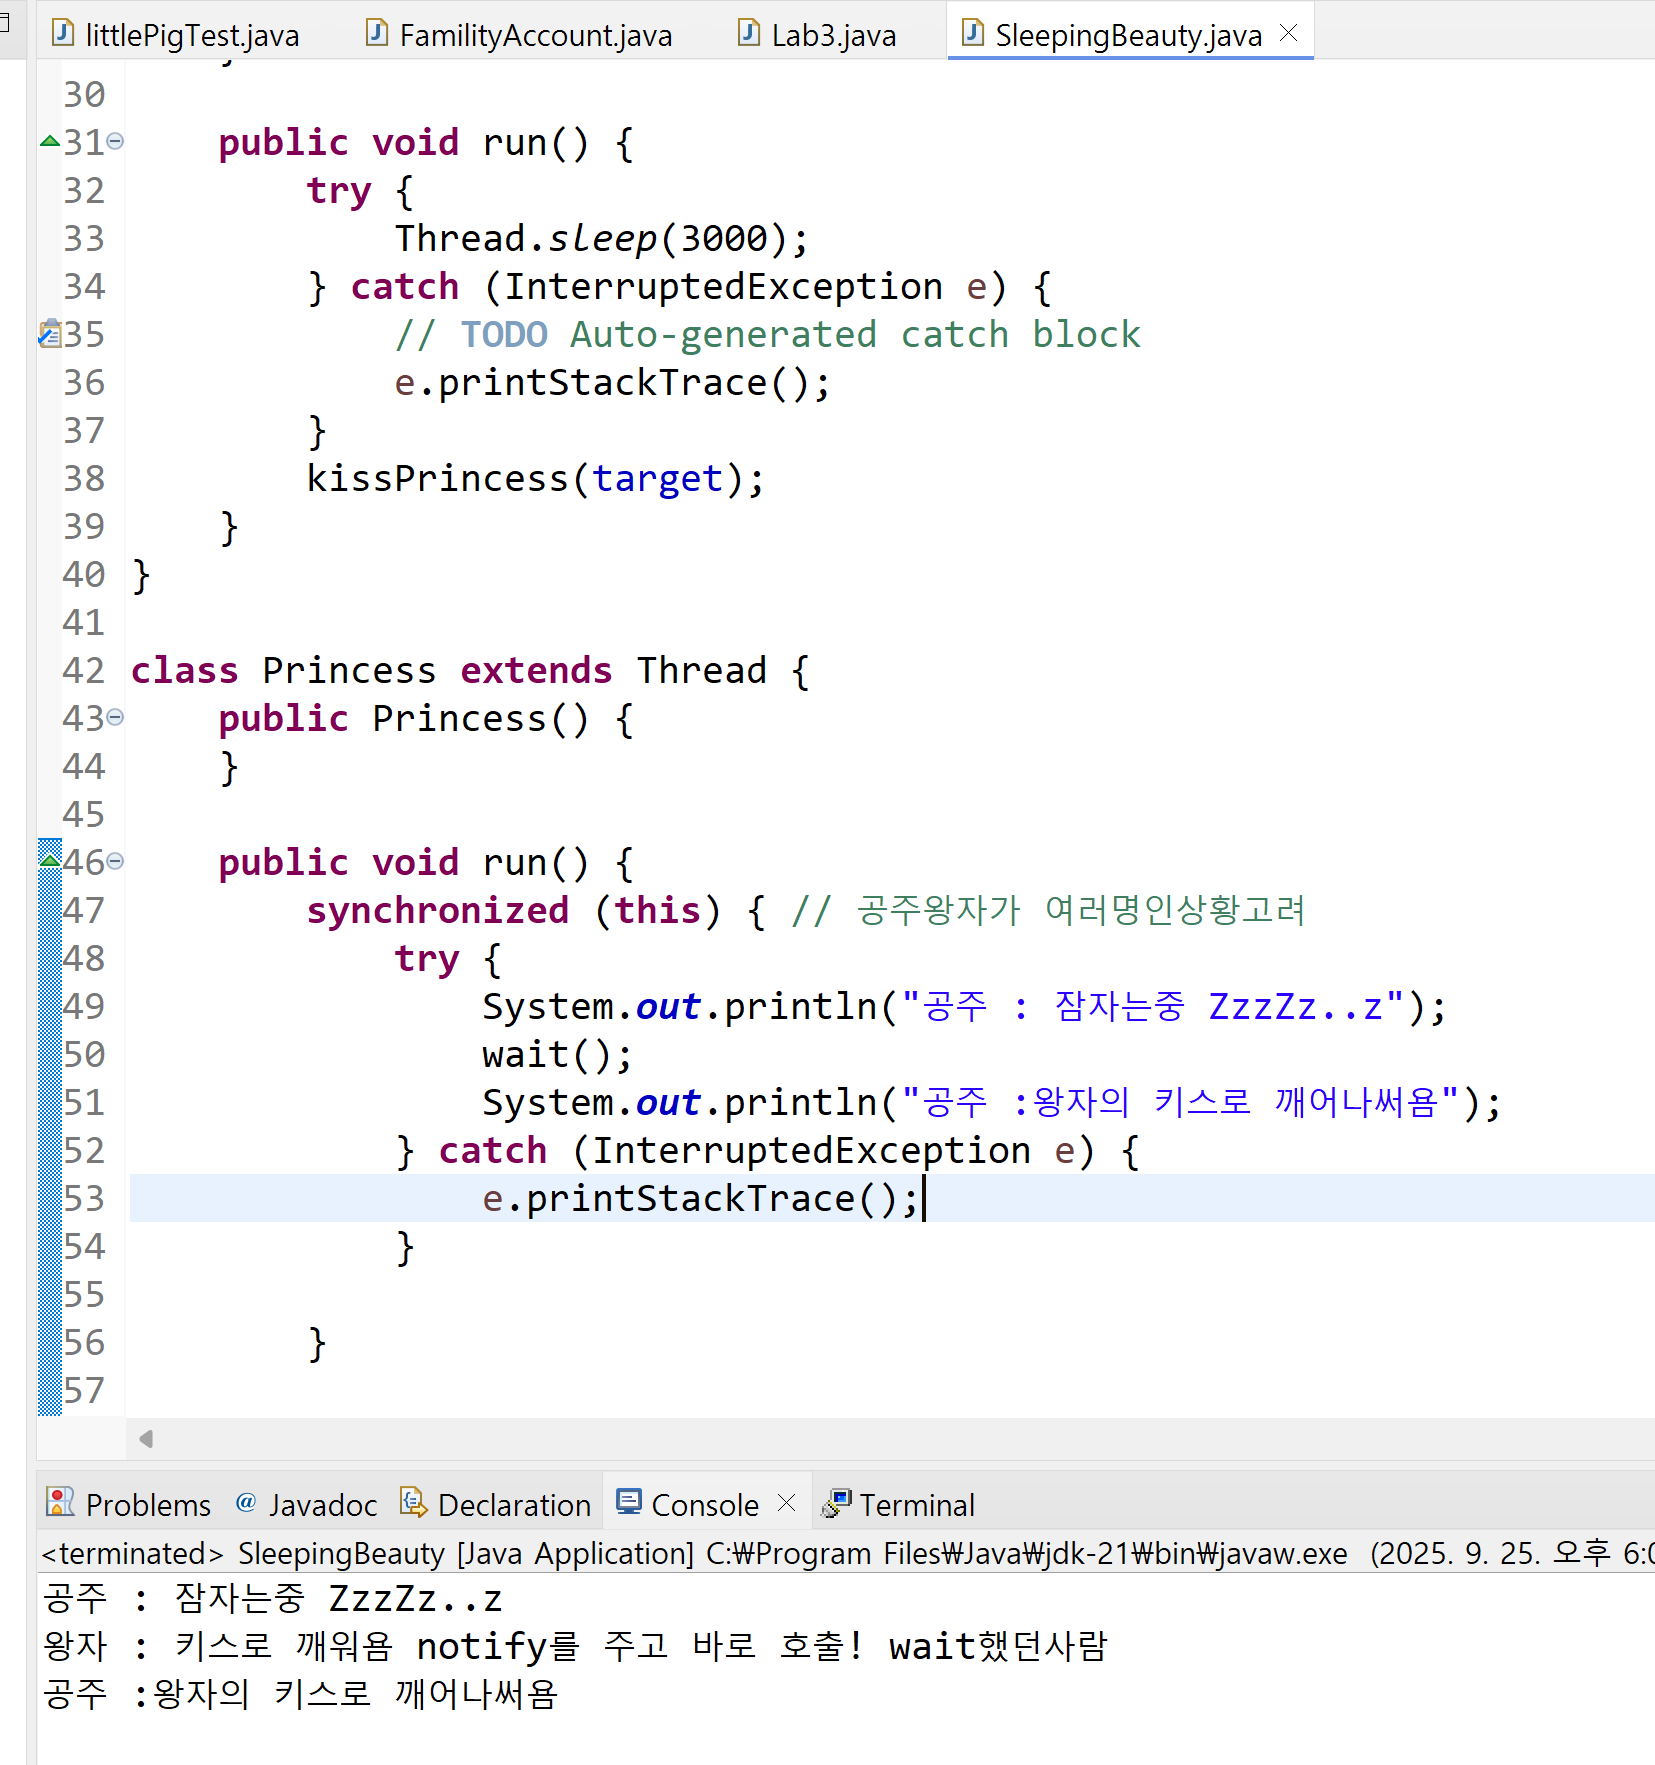
lab#8 잠자는 숲속의 공주와 왕자
package Week4Thread;

public class SleepingBeauty {

	public static void main(String[] args) {
		// TODO Auto-generated method stub

		Thread princess = new Princess();
		Thread prince = new Prince(princess);
		princess.start();
		prince.start();

	}

}

class Prince extends Thread {
	Thread target;

	public Prince(Thread target) {
		this.target = target;
	}

	public void kissPrincess(Thread target) {
		synchronized (target) {
			System.out.println("왕자 : 키스로 깨워욤 notify를 주고 바로 호출! wait했던사람");
			target.notify();
		}
	}

	public void run() {
		try {
			Thread.sleep(3000);
		} catch (InterruptedException e) {
			// TODO Auto-generated catch block
			e.printStackTrace();
		}
		kissPrincess(target);
	}
}

class Princess extends Thread {
	public Princess() {
	}

	public void run() {
		synchronized (this) { // 공주왕자가 여러명인상황고려
			try {
				System.out.println("공주 : 잠자는중 ZzzZz..z");
				wait();
				System.out.println("공주 :왕자의 키스로 깨어나써욤");
			} catch (InterruptedException e) {
				e.printStackTrace();
			}

		}

	}
}
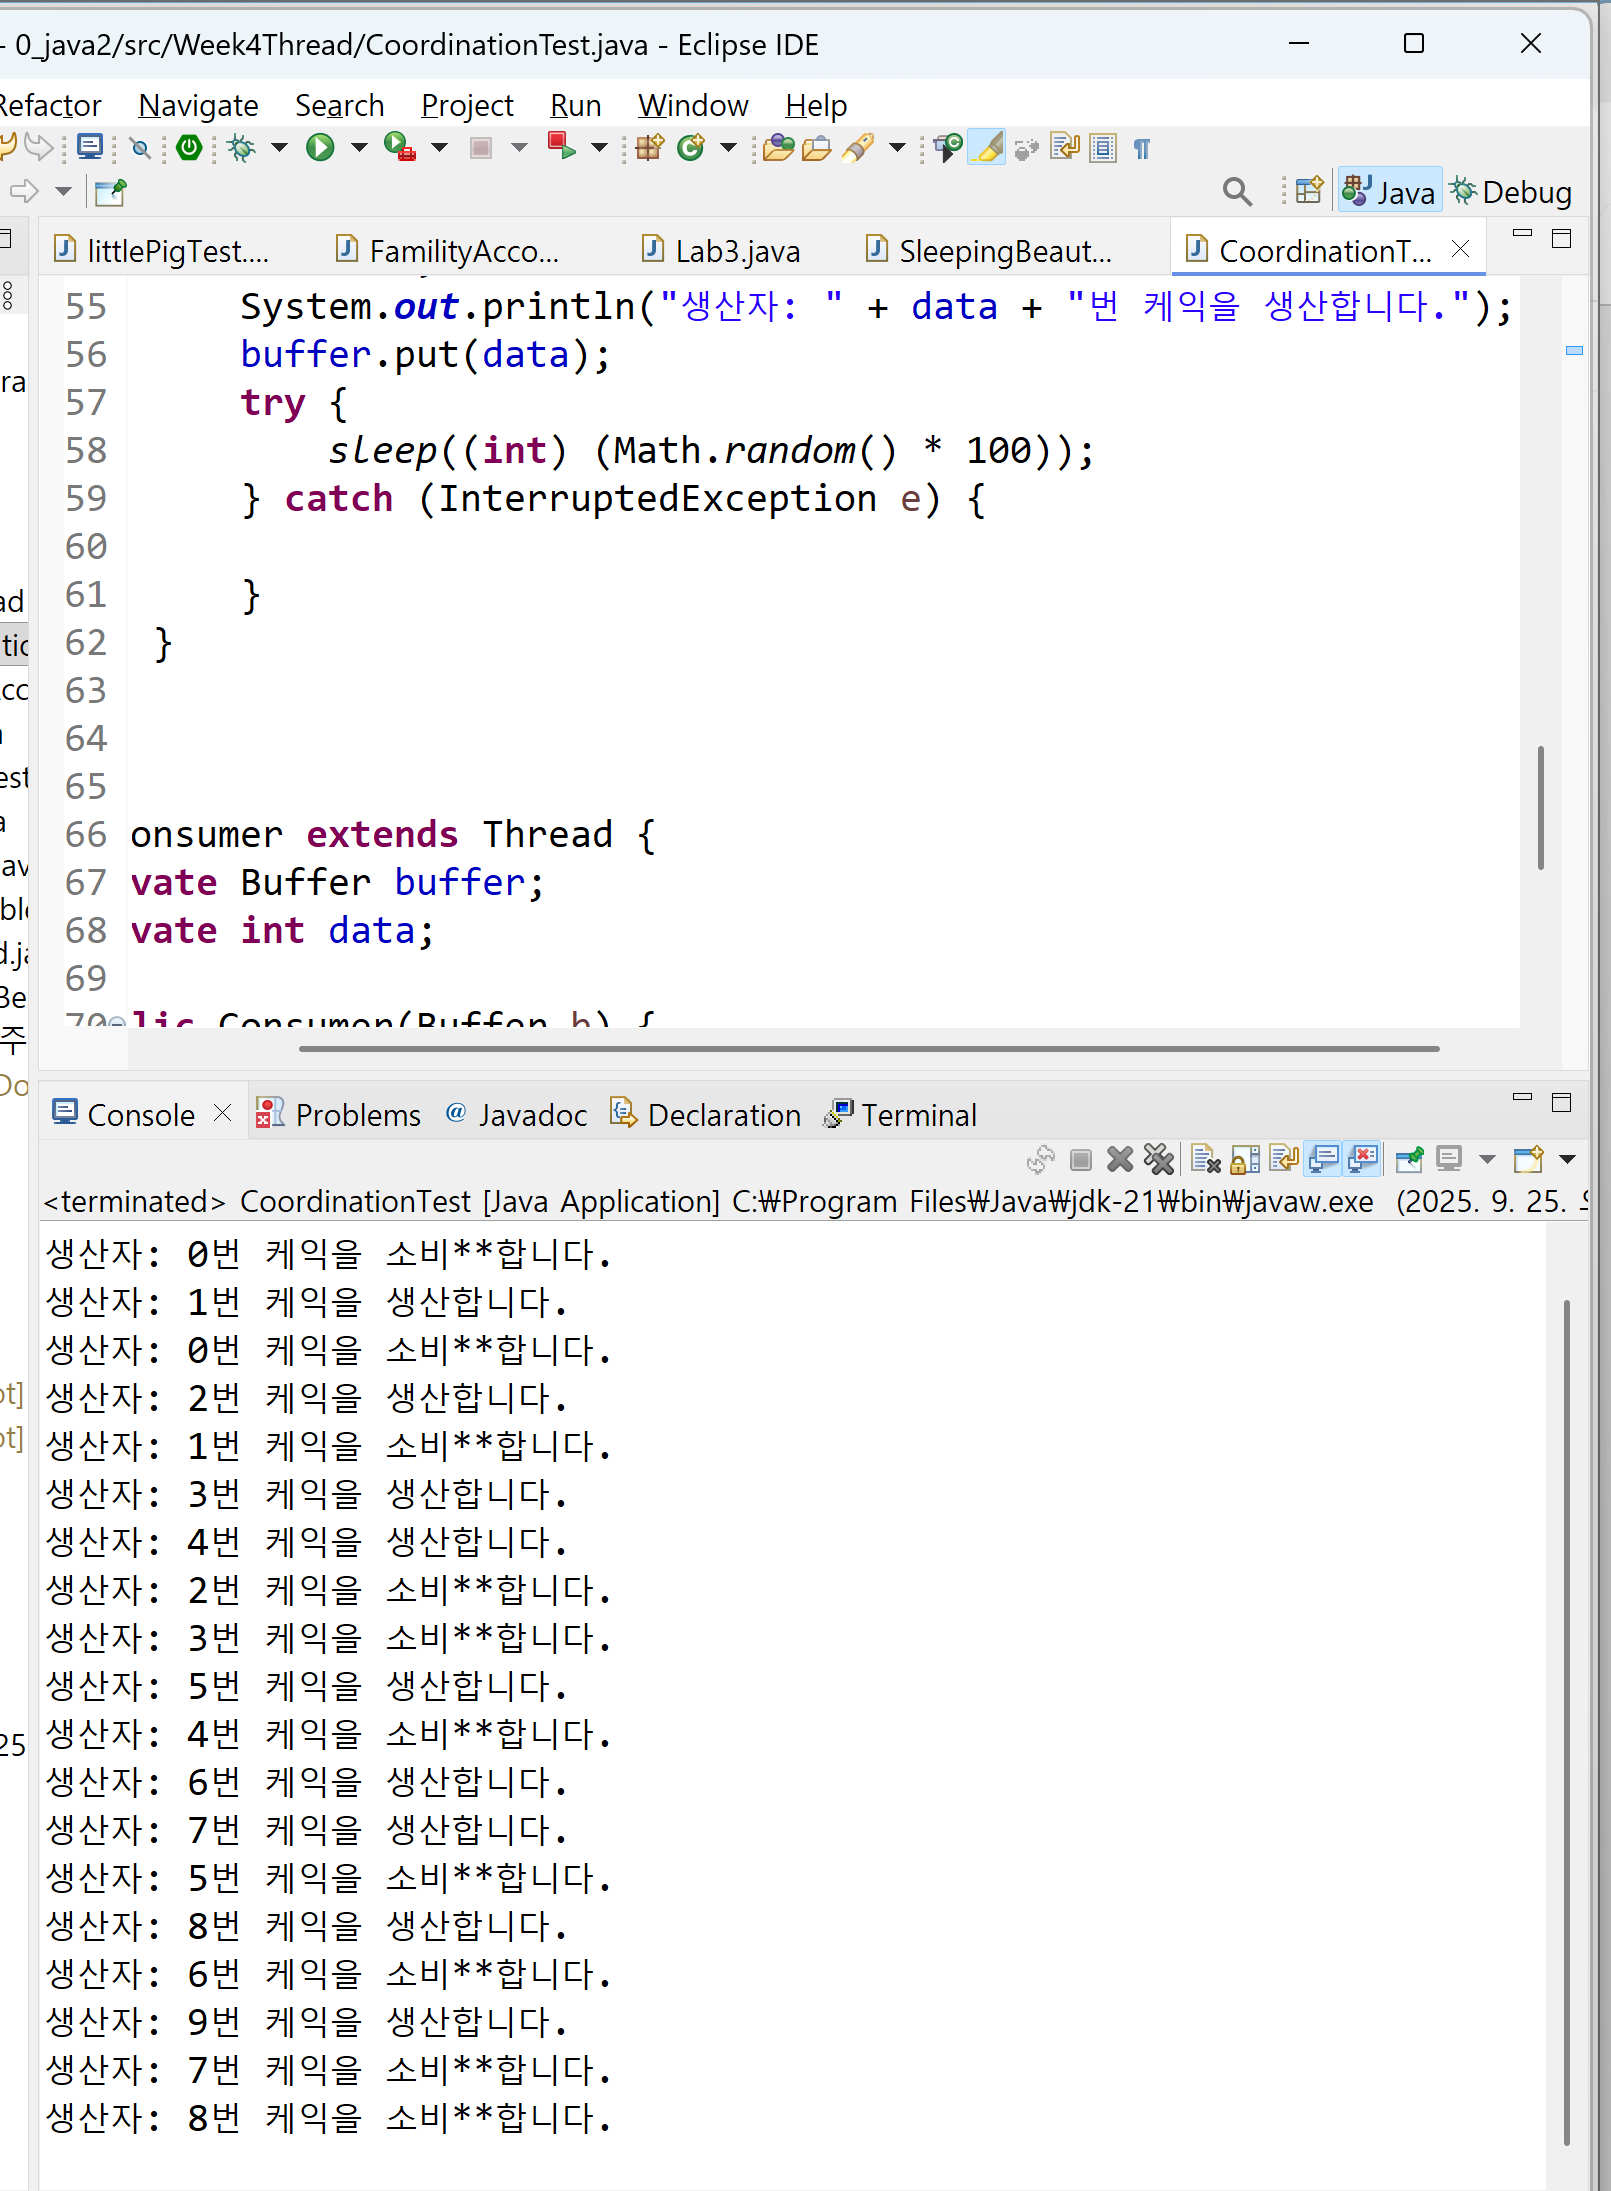
lab#9 & lab#10 빵생산/빵공장 예시로 다시한번 해보자!
좌측 사진을보면, 빵을 만들지도않았는데 냅다 소비하는 모습을 볼 수 있다. Buffer 클래스에 wait 과 , notifyALl()을 넣어주니 정상적으로 빵이 생성되고 나서야 접근하는 모습을 확인할 수 있었다.
여기있는 주석표시를 해제하면 우측처럼나오고, 주석표시를 유지하면 좌측처럼 중구난방처럼나온다.
package Week4Thread;

public class CoordinationTest {
	public static void main(String[] args) {
		// TODO Auto-generated method stub
		Buffer b = new Buffer();
		Producer t1 = new Producer(b);
		Consumer t2 = new Consumer(b);
		t1.start();
		t2.start();
	}
}

class Buffer {
	private int data;
	private boolean empty = true;

	public synchronized int get() {
//		while (empty) {
//			try {
//				wait();
//			} catch (InterruptedException e) {
//			}
//		}
//		empty = true;
//		notifyAll(); // notify producer !
		return data;
	}

	public synchronized void put(int data) {
//		while (!empty) {
//			try {
//				wait();
//			} catch (InterruptedException e) {
//			}
//		}
//		empty = false;
		this.data = data;
		// notify consumer that status has changed
//		notifyAll();
	}
}

class Producer extends Thread {
	private Buffer buffer;
	private int data;

	public Producer(Buffer b) {
		buffer = b;
	}

	public void run() {
		for (int i = -0; i < 10; i++) {
			data = i;
			System.out.println("생산자: " + data + "번 케익을 생산합니다.");
			buffer.put(data);
			try {
				sleep((int) (Math.random() * 100));
			} catch (InterruptedException e) {

			}
		}
	}
}

class Consumer extends Thread {
	private Buffer buffer;
	private int data;

	public Consumer(Buffer b) {
		buffer = b;
	}

	public void run() {
		for (int i = 0; i < 10; i++) {
			System.out.println("생산자: " + data + "번 케익을 소비**합니다.");
			data = buffer.get();
			try {
				sleep((int) (Math.random() * 100));
			} catch (InterruptedException e) {
			}
		}
	}
}

'컴퓨터공학과 > Java 1 & 2' 카테고리의 다른 글
| [Java] SOLID 실습 짱구의 매너전략 (0) | 2025.10.15 |
|---|---|
| [Java] 커피메이커 리팩토링 - SOLID 원칙 적용 +V2,V3 | 추가패턴조사 (0) | 2025.10.11 |
| [Java] Set과 Map (0) | 2025.09.17 |
| JAVA backjoon 10815 이진탐색, 스트링빌더, 배열 (0) | 2025.07.13 |
| JAVA프로그래밍및실습/최윤정교수님/기말고사 범위 (0) | 2025.06.08 |